Introduction: Why Winged Eyeliner and Who Benefits
Winged eyeliner is a type of makeup art which enhances the look of the eyes. It adds definition and intensity to your eyes, making them appear brighter and more open. It can be used to add a subtle or dramatic touch to any look. Winged eyeliner is suitable for all ages and eye shapes, and can be used to create a variety of looks.
For those who are new to makeup, applying winged eyeliner can seem daunting, but with the right techniques and practice, anyone can master it. This guide covers the basics of winged eyeliner, from the right supplies to choose, to step-by-step instructions on application, to advanced makeup techniques for added effects. It also provides tips and tricks to help you perfect your wing each time, as well as advice for those with little experience with winged eyeliner.
This guide covers all aspects of winged eyeliner, from understanding the basics of winged eyeliner to creating a range of looks with it. No matter what level of experience you have with winged eyeliner, this guide will provide you with the insight and tools necessary to achieve the perfect look every time.
Preparing to Apply Winged Eyeliner: Choosing the Right Supplies
Before you are able to start applying your eyeliner, it’s important that you have the right supplies. Perfecting the winged eyeliner look is not an easy task, however, having the right tools to help provide guidance and structure can make the process much smoother. Here are some of the supplies you should consider when looking to apply your eyeliner.
- Eyeliner Pencil – This is a great tool for outlining your look before your begin to apply your liquid eyeliner. Having a pencil allows you to plan out your wings in perfect shape. It will also help you get more consistent wings each time you apply your eyeliner.
- Liquid Eyeliner – For a better hold and finish, liquid eyeliner is the go-to choice for winged eyeliner looks. It requires a steadier hand, however many find it easier than pencil liners.
- Q-Tip or Cotton Swab – Q-tips or cotton swabs are great for making mistakes. You can use them to clean up any areas that need to be sharpened after applying your eyeliner. They are also very handy in case you need to add more eyeliner for a bolder look.
- Mirror and Good Lighting – When applying your eyeliner, it’s important that you can see exactly what you are doing. Having a mirror and good lighting gives you the best view of your progress, so you can see the overall effect of your look.
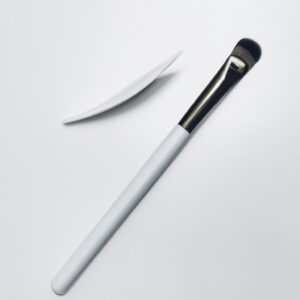
- Makeup Brushes – Makeup brushes come in various shapes and sizes, and using one can make all the difference. Whether you’re using it to blend eyeshadow or to sharpen the edges of your eyeliner, makeup brushes are essential for creating flawless wings.
The right supplies are essential when executing a winged eyeliner look, and having the most suitable tools will help ensure your finished look is beautiful and perfect every time.
Step-By-Step Instructions for Applying Winged Eyeliner
Winged eyeliner is a fun way to add some drama and glamour to your everyday makeup look. It can be tricky to master, but with practice, you’ll find it becomes easier and easier to achieve that perfect winged eye! Here’s how to apply winged eyeliner step-by-step:
- Start by tightening the skin around your eyes. This will make it easier to draw a straight line along your eyelash line.
- Dip the tip of your eyeliner pencil into the eyeliner pot. Gently move the liner across your lash line in a smooth, straight motion.
- Once you’ve reached the end of your lash line, and you have created a straight line, it’s time to start the cat-eye. Starting from the end of the line you just drew, slowly draw a thin line up diagonally towards the end of your eyebrow.
- Continue drawing the line up and outward until you have reached your desired length of the wing. Be sure to keep the line as thin as possible!
- Using the pencil, fill in the gap between the line and your lash line so that the wing looks even and continuous.
- Go over the lines a few times to ensure they are nice and dark, then take a cotton swab and blend any harsh edges.
- Finish off by applying some mascara to help blend the look further.
And there you have it! You have now successfully applied the perfect winged eyeliner look. With practice, achieving beautiful wings will get easier and easier, and soon you will be a pro at perfecting this classic look.
Tips and Tricks for Perfect Winged Eyeliner Every Time
When it comes to mastering the art of applying winged eyeliner, a few simple tips and tricks can make all the difference. Here are some expert advice and tips to help you achieve the perfect winged eyeliner look every time.
- Start by Preparing Your Skin
- Cleanse your skin and pat it dry before applying any makeup. This helps remove any leftover dirt or oils that may interfere with your eyeliner application.
- Moisturize your skin around the eyes to prevent any dryness or irritation. Use an eye cream and blend away from the lash line to avoid smudging your eyeliner.
- Choose The Right Tools and Products
- Invest in a good quality eyeliner pencil or liquid eyeliner for the best results. Pencil is great for a softer look while liquid eyeliner helps you create a sharper look.
- Also consider the color of the eyeliner. Black is traditional but try experimenting with browns, purples and blues to find out what looks best on you.
- Draw a Guide Line First
- To ensure your wings are even and symmetrical, draw a thin guide line first. This will act as a guide for you when you start to draw the actual wing.
- Use a light hand and crisp strokes when drawing the guide line so that it’s easier to draw the wings with the desired shape and length.
- Lift Up Your Lid
- As you draw the wing, lift your upper lid up using your free hand. This will give you a better view of the area you’re working with and make it easier to draw the wing accurately.
- It also helps to use a mirror tilted slightly downwards so that you can see the shape of the wing more easily.
- Fill In Your Wings
- Once you’ve drawn the outer wings of your eyeliner, start filling in the inner part of the wing. Add extra layers of the eyeliner in sections until you reach the desired intensity.
- You can even use a small angled brush and eyeshadow to fill in the wings for a more precise look.
- Line Your Eyes And Blend
- After the wings are done, start lining your eyes along the lash line and blend it inwards. Use gentle swiping motions and use a cotton bud to soften the edges of the eyeliner for a more subtle look.
- It’s also important to apply some mascara to complete the look. This will enhance the appearance of your wings and add extra definition to your eyes.
Difference Between Winged Eyeliner and Other Styles
Winged eyeliner is a classic makeup look; one that adds flair and drama to any ensemble. It draws attention to the eyes and gives the look of sharp, precise winged lines. But when compared to other popular eyeliner styles, what makes winged eyeliner different?
The most noticeable difference between these styles lies in the shape of the liner. Traditional eyeliner is applied in a smooth line along the lashline, with no dramatic points or wings. On the other hand, winged eyeliner has two wings – one at the end of each eye – that form an inverted “V” shape. The most common way to achieve this is by drawing a thin line from the inner corner of each eye, then flicking out the edges into the desired shape.
The effect of winged eyeliner is to make the eyes appear larger and more dramatic. Applying it takes a steady hand and practice, as it requires precise application. It is often paired with a darker eyeshadow and false lashes for added definition.
Other popular eyeliner styles include a smudged, smoky look, which is achieved by blending the eyeliner around the eye and onto the outer corner. This style is more subtle than winged eyeliner and is easier to apply. The cat eye look is also popular, and is achieved by applying thick liquid eyeliner in an upward stroke from the inner corner of the eye.
Common Mistakes to Avoid When Applying Winged Eyeliner
Winged eyeliner is a bold and beautiful look, but it’s important to avoid making mistakes in order to achieve the perfect, flawless line every time. Here are some of the most common mistakes to avoid when applying winged eyeliner:
- Not Preparing Your Lids: Before applying eyeliner, make sure you are starting off with a clean surface. Remove all traces of makeup and oils and use an eyeshadow primer to ensure your eyeliner stays put.
- Not Testing the Product: Make sure to perform a patch test with any new eyeliner before applying it to your eyes. Many products contain allergens that can irritate the eyes. Pay special attention to waterproof eyeliners as these can cause long-term damage.
- Not Using the Right Brush Size: The size of the brush you use will depend on the size of your eyes. If you use a brush that is too large, it will be difficult to create a precise line. Too small, and it may drag and tug at the delicate skin around your eyes.
- Applying Too Much Pressure: Always use minimal pressure when applying eyeliner. Pressing too hard will cause the eyeliner to smudge and create an uneven line. Instead, use light strokes to apply the liner.
- Not Taking Breaks: Always take breaks between coats of eyeliner. Allowing the product to dry between applications will prevent it from accumulating and looking clumpy.
- Not Cleaning Up the Line: Winged eyeliner looks best when the lines are crisp and clean. After applying the liner, use a cotton swab to soften, shape, and remove any excess product.
By avoiding the common mistakes listed above, you’ll be able to achieve a flawless winged eyeliner look every time.
Advanced Makeup Techniques to Enhance Winged Eyeliner Look
Winged eyeliner is a great way to add definition to the eyes and make them appear larger and wider. But how can you take your winged eyeliner look to the next level? With a few advanced makeup techniques, you can make your wings stand out even more and look even better!
First, consider adding a lighter shade of eyeshadow above the wing. This can help create more of a contrast with the eyeliner and enhance the shape of the winged look. For best results, use a light shimmery color such as white, silver, or champagne.
One of the most popular techniques for making winged eyeliner stand out is to add a thin line of black eyeliner below the lower lash line. This can further accentuate and define the winged look, creating an even more dramatic effect. Make sure to use a precise liner brush for this step so your line will be cleaner and more even.
If you want a really bold look, try smudging your winged liner for a smokey effect. To do this, simply grab a smudge brush and gently blend the liner in an outward direction. This will create a softer but still dramatic look. Just be careful not to overdo it or else it will end up looking messy.
Finally, make sure your wings are properly framed with mascara. Curling your lashes beforehand will help keep the curl even after you apply the mascara. If you really want to make your wings ‘pop’, consider adding some false lashes as well.
With these advanced makeup techniques, you can easily take your winged eyeliner look to the next level. Whether you’re going for a dramatic smoky look or a soft and subtle look, these tips can help you create the perfect winged eyeliner every time!
Expert Advice for Those with Little Experience with Winged Eyeliner
Applying winged eyeliner can seem daunting, especially for those with little experience. Fortunately, with the right tools and some practice, it’s easier than you may think. Here are some expert tips to get you started:
- Start out by using a very thin brush or mechanical eyeliner pencil. These allow you to create thin lines that are easy to control.
- If possible, use waterproof eyeliner. This will ensure that your wings stay put all day.
- Have patience. Practice makes perfect! Taking the time to practice your technique will help you achieve the look you want.
- Don’t be afraid to make mistakes. Mistakes are part of the learning process and can help you figure out what works and what doesn’t.
- Start by creating a thin line from the inner corner of your eye to the outer corner. Once you feel comfortable with this, start to build up the line until you’ve achieved the look you want.
- Use a cotton swab dipped in makeup remover to clean up any smudges or mistakes along the way.
- When you’ve finished applying your wings, fill in the rest of the eye with black liner if desired. You can also add eyeshadow to the crease to enhance the look.
- Finally, set your eyeliner with a thin layer of translucent powder, this will help keep your wings in place.
Remember, winged eyeliner may take some practice but it is achievable. With some patience, you can master the technique and perfect the look every time. Good luck!
Different Looks with Winged Eyeliner
Winged eyeliner has many different looks that you can try. The fundamentals of applying the liner remain the same, but the final look can vary greatly. Let’s look at some different looks that you can create with winged eyeliner.
- The classic winged eyeliner look is a sharp, pointed line that starts from the inner corner of the eye and angles outwards towards the end of your eyebrow.
- Cat-eye eyeliner is a look that’s a bit more dramatic. It features a thicker line that starts from the inner corner and gradually thickens as it goes outwards, with a more dramatic point at the end.
- Smokey winged eyeliner is a softer look, with diffused edges and less of an angle on the wing. It looks especially good when paired with a smudged eyeshadow look.
- The fishtail eyeliner look is similar to the classic winged look, but with two points instead of one. It’s a great way to add some drama to your look without being too over the top.
Once you’ve mastered the basics of winged eyeliner, this list of different looks can help you create something special for any occasion.
Summary & Conclusion
Winged eyeliner is an iconic and timeless look that suits many different face shapes and eye shapes. Knowing how to apply it can help you create the perfect look for any occasion. With the right supplies and knowledge, anyone can achieve this beautiful, classic look.
We started off by looking at why winged eyeliner and who benefits from it, covering how it can enhance your look and define your eyes. We then went on to look at how to prepare for appliying winged eyeliner, choosing the right supplies, and followed with step-by-step instructions for applying winged eyeliner.
Next, we looked at some tips and tricks for perfecting your winged eyeliner every time, as well as the differences between winged eyeliner and other styles. We also looked at common mistakes to avoid when creating a winged eyeliner look and discussed advanced techniques to enhance the look. Expert advice for those with little experience was provided, as well as different looks that can be created with winged eyeliner.
In summary, creating the perfect winged eyeliner look doesn’t have to be difficult or intimidating. With the right preparation and practice, anyone can master the art of winged eyeliner.
Resources, References & Acknowledgements
Creating flawless winged eyeliner requires practice and knowledge. To help those create beautiful wings, we’ve gathered the best tips and tricks from experienced makeup artists and beauty experts.
To get you started, here is a list of resources to help guide you while applying winged eyeliner:
- Makeup Geek: This website has valuable tutorials and product reviews to help you choose the right products for your winged eyeliner.
- The Beauty Department: This website offers comprehensive advice and tips on how to perfectly apply winged eyeliner.
- LiveGlam: This resource provides helpful videos and guides from beauty gurus who specialize in eye makeup.
- YouTube: YouTube videos by professional makeup artists can provide step-by-step instructions for creating the perfect winged eyeliner.
Acknowledging all the great resources that have helped us along the way is an important part of creating this guide. We’d like to thank the following people for their insight and advice while creating this guide:
- Samantha Farhi – a professional makeup artist with experience creating various looks with winged eyeliner.
- Nina Meyer – an experienced beauty writer and expert.
- Elena Shaffer – a beauty blogger with expertise on the different styles of winged eyeliner.
We are incredibly grateful for their input and contribution to this guide.
FAQs
Applying winged eyeliner can be tricky and may be intimidating for some. To help make the process easier, we’ve gathered some of the most commonly asked questions about expert tips for applying flawless winged eyeliner.
- Q: What is the best type of eyeliner to use?
A: Liquid eyeliner is generally the recommended type as it is easier to control and will give you a more precise finish than other options like pencil or gel. - Q: What other supplies do I need to apply winged eyeliner?
A: In order to get the best result, you’ll need an eyeliner brush, q-tips, some eyeshadow and a primer. - Q: How can I avoid mistakes when applying winged eyeliner?
A: Make sure to prep your skin with a primer and moisturizer before applying the liner. It’s also important to take your time and not rush the application process. Use q-tips to clean up any mishaps. - Q: How can I make my winged eyeliner last longer?
A: After you’ve finished drawing on the winged eyeliner, it is important to set it in place with an eyeshadow that matches the color of the liner. This will help prevent smudging and fading throughout the day.
comments: 0